HDR Tutorial
HDR Tutorial – High Dynamic Range Photography

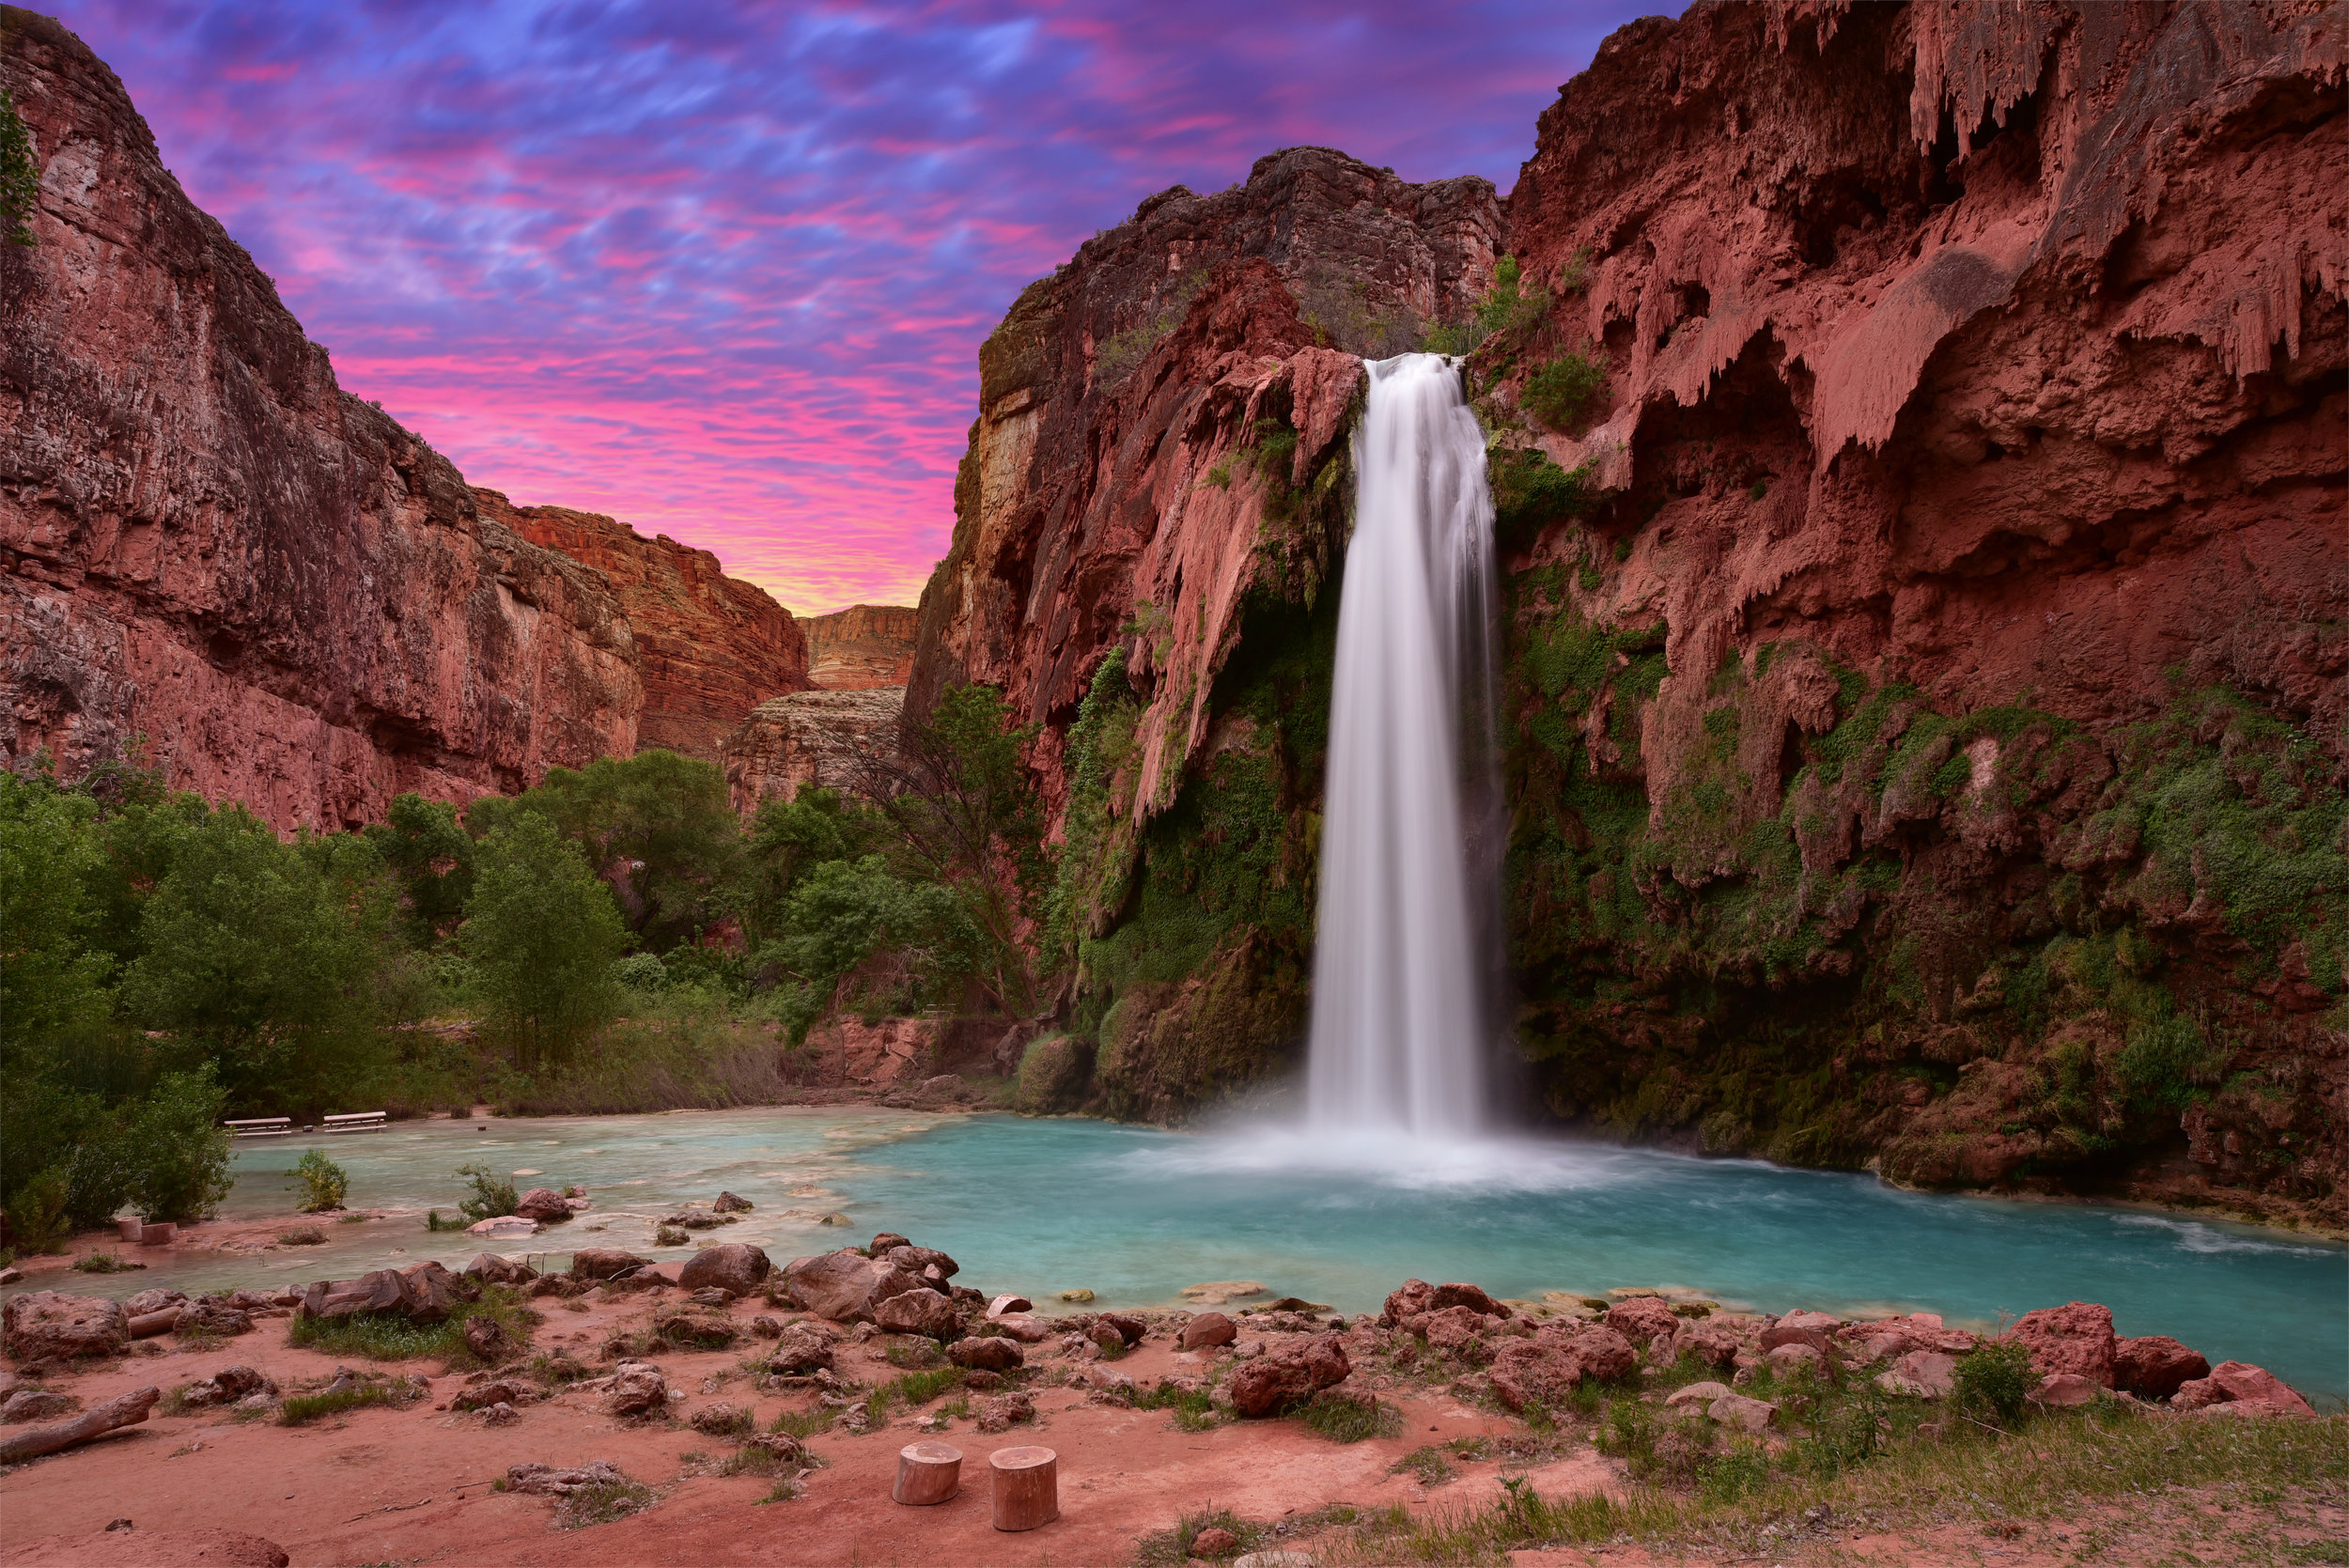
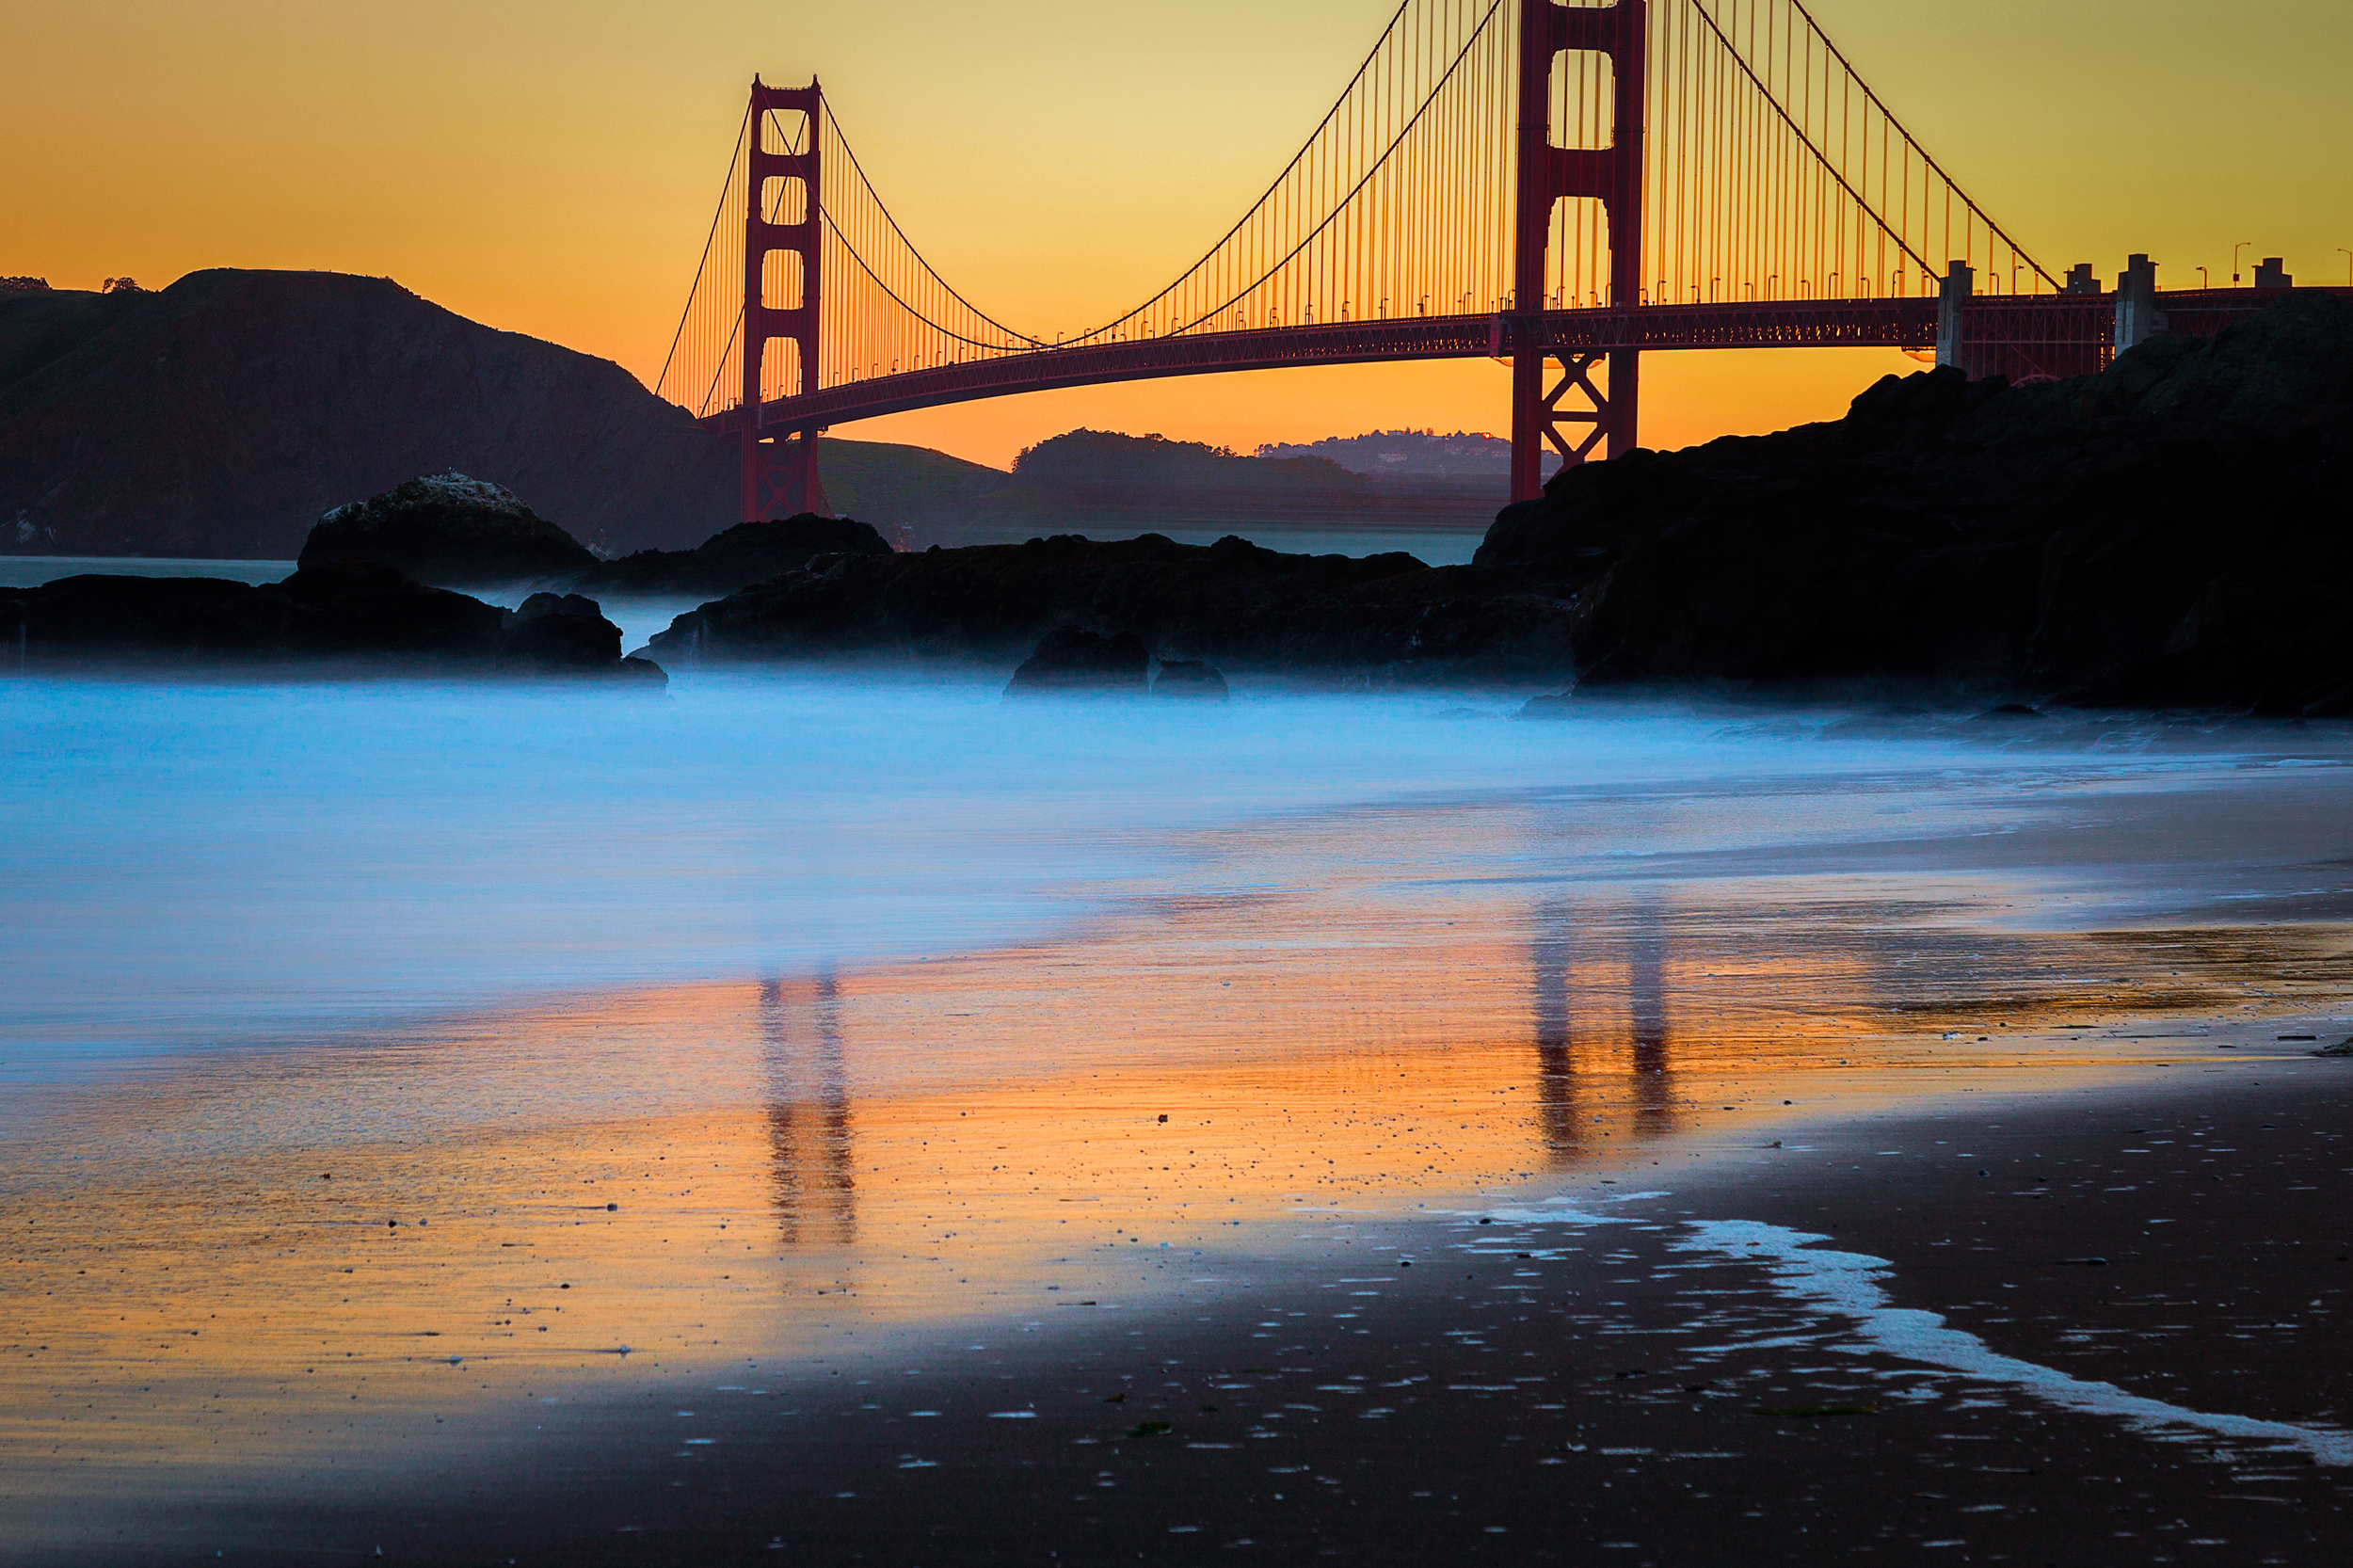
Prior to learning HDR photography, I couldn't take a decent photo of San Francisco's Skyline without blowing out the sky or having a really dark foreground. It wasn't until my internship at DreamWorks Animation that I started to get better at photography. I took a night photography class and the teacher taught HDR, which opened a new world of photography for me. I started to go out every night shooting anything and everything because HDR instantly made my photos look like the professionals! I was addicted.
In this HDR tutorial, I'll be going over the basics of what HDR photography is, how to shoot HDR photography, camera settings, and merging HDR photos in Lightroom.


What is HDR Photography
HDR or High-Dynamic Range photography is the process of taking multiple exposures (anywhere from 3-7 pictures) and stacking them into one photo.
By stacking them together, HDR gives you the ability to capture all of the light so that you a nicely lit foreground and background.
How To Shoot HDR Photos
Materials
- Camera
- Tripod
- Shuttle Release/Remote (optional)
- Lightroom
Location
After you gathered your materials, it's time to find a location and subject. You can pretty much shoot anything in HDR. Things that move might be a little hard and will require high deghosting when merging (will cover later in tutorial).
I usually go for lush landscapes or a city skyline. To get the most out of your HDR photos, I recommend shooting during sunset.
Camera settings
Once you found a location and your tripod has been set up, there are three things you'll need to do in your camera settings before you start shooting.
1. Change the "Exposure comp/AEB setting" to cover -1 & 1
Find "Expo.comp/AEB" in your camera settings
Click "OK" to enter
Using your turn dial (next the shuttle button), turn two cycles until the two smaller red lines hit -1 & 1. Hit "OK" to set.
Shoot in RAW - HDR Tutorial
2. Shoot in RAW
If you haven't done so already, change your image quality to RAW instead of JPEG.
RAW, even thought it takes up quite a bit of space, keeps all the picture's information so in the post-processing phase, you can get more color out of it.
3. Change to "Self-timer:2sec" or have a Remote/Shuttle Release ready
2 Second Self-Timer
Remote Control or Shuttle Release
Ranges from $10-100. They all do the job.
Begin Shooting
After your settings have been changed, you can begin shooting. Turn your camera into Live View mode so that you can see what you are shooting on your screen.
- If you are using a remote/shuttle release:
- Hold down the button and let the camera do its work. You'll hear three snaps. Don't touch it until it has finished. You don't want a blurry photo.
- If you are using the 2 second self-timer:
- Hold the shuttle button down. Once the camera begins to count down, take your finger off. Try not to leave the camera shaking when releasing your finger. We want to have no shakiness.
Continue shooting until you feel like you got a couple of good shots.
How To Merge Into HDR Photos
After shooting, import your photos into Lightroom. Find a set of 3 that you'd like to use. Lightroom has made it super easy to merge HDR photos.
How to Merge HDR in Lightroom
1. Highlight the 3 photos by:
- Clicking on the first photo
- Holding down "Shift"
- Clicking on the last photo
How to Merge HDR in Lightroom
2. Go to "Photo Merge" by:
- Control-click on one of the images
- A drop-down list will appear
- Hover over "Photo Merge" and click "HDR"
Deghost Amount - None
3. A window called "HDR Merge Preview" should pop up.
Here you'll select your HDR options.
Auto Align - Aligns the merged photo to make it straight. I leave it checked.
Auto Tone - Fixes the highlights and shadows automatically. I also leave it checked. (After the merge, if you don't like the auto tone, you can always reset it)
Deghost Amount - Because you are merging multiple photos, objects might have moved in each photo. Deghosting tries to erase the blur of the object moving.
If you look at the red circle in the "Deghost Amount - High" image, you can see cars and very minimal light trails. Compare this to the above photo "Deghost Amount - None" and you can see light trails with very minimal cars. The deghosting software tries to eliminate the cars moving.
In the "Show Deghost Overlay" image, you can see where the software deghosted the image by having the box checked.
Deghost Amount - High
Show Deghost Overlay
4. Hit "Merge"
You should see the merged photo in the bottom with a "- HDR" attached to the file name.
If you can't find it:
- Go to "Library"
- Under "Catalog", select "All Photographs"
- Find the group of photos that you just merged. The newly merged photo should be in there as well
Great job! Now that you have created your HDR photo, let's learn how to post-process it to make it even better!